

As a supplier of chrome motorcycle vinyl, I've encountered numerous customers eager to achieve a flawless finish when installing our products. In this blog, I'll share some invaluable tips and techniques to ensure a smooth and professional-looking installation.
Preparation is Key
Before you even begin the installation process, thorough preparation is essential. Start by cleaning the surface of your motorcycle where the vinyl will be applied. Use a high-quality automotive cleaner to remove any dirt, grease, wax, or other contaminants. A clean surface is crucial for proper adhesion and to prevent air bubbles or imperfections.

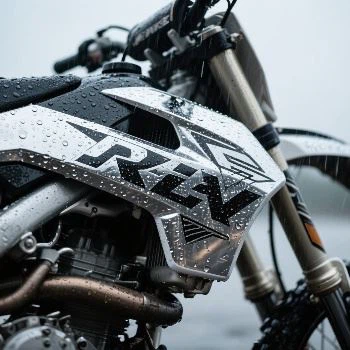
Next, measure the area where the vinyl will be installed. This step is vital to ensure you have the correct amount of vinyl and to minimize waste. It's always a good idea to measure twice and cut once. Additionally, take the time to plan the layout of the vinyl. Consider the shape of the motorcycle and how the vinyl will flow around curves and edges. This will help you achieve a seamless and visually appealing finish.
Choosing the Right Vinyl
Not all chrome motorcycle vinyls are created equal. When selecting a vinyl for your project, consider the quality, durability, and flexibility of the material. At our company, we offer a wide range of high-quality chrome motorcycle vinyls, including Motorcycle Chrome Wrap, Motorcycle Wap Vinyl - Matte Silver, and Motorcycle Wrapping Vinyl - Mirror Silver. These vinyls are designed to withstand the rigors of the road and provide a long-lasting, professional finish.
Tools of the Trade
Having the right tools on hand can make a world of difference when it comes to installing chrome motorcycle vinyl. Some essential tools include a heat gun, squeegee, utility knife, and a spray bottle filled with a soapy water solution. The heat gun is used to soften the vinyl, making it more flexible and easier to conform to the shape of the motorcycle. The squeegee is used to smooth out the vinyl and remove any air bubbles. The utility knife is used to trim the excess vinyl, and the soapy water solution helps to lubricate the surface and prevent the vinyl from sticking prematurely.
Installation Process
Now that you have everything you need, it's time to start the installation process. Begin by spraying the surface of the motorcycle with the soapy water solution. This will create a slippery surface and make it easier to position the vinyl. Carefully place the vinyl on the surface, starting at one end and working your way across. Use the squeegee to smooth out the vinyl and remove any air bubbles. As you go, use the heat gun to warm the vinyl and make it more flexible. This will help the vinyl conform to the shape of the motorcycle and prevent it from cracking or peeling.
Once the vinyl is in place, use the utility knife to trim the excess vinyl. Be sure to cut along the edges of the motorcycle, leaving a small amount of overlap. This will help to prevent the vinyl from lifting or peeling over time. After trimming the excess vinyl, use the squeegee to smooth out the edges and ensure a tight seal.
Finishing Touches
After the vinyl is installed, take the time to inspect the surface for any air bubbles or imperfections. If you find any, use the heat gun to warm the vinyl and the squeegee to push out the air bubbles. You may also need to use a pin or a needle to puncture the air bubbles and release the air. Once the surface is smooth and free of air bubbles, use a clean, dry cloth to wipe away any excess water or soap.
Maintenance and Care
To ensure the longevity of your chrome motorcycle vinyl, it's important to take proper care of it. Avoid using abrasive cleaners or tools that could scratch or damage the vinyl. Instead, use a mild soap and water solution to clean the surface. Additionally, avoid exposing the vinyl to extreme temperatures or direct sunlight for extended periods of time. This can cause the vinyl to fade or crack over time.
Conclusion
Installing chrome motorcycle vinyl can be a challenging but rewarding project. By following these tips and techniques, you can ensure a smooth and professional-looking finish that will enhance the appearance of your motorcycle and protect it from the elements. If you have any questions or need further assistance, please don't hesitate to contact us. We're here to help you achieve the perfect look for your motorcycle.
If you're interested in purchasing our chrome motorcycle vinyl or have any questions about our products, please feel free to reach out to us. We'd love to discuss your project and help you find the perfect solution for your needs.
References
- "Automotive Vinyl Installation Guide." Available at https://www.example.com/automotive-vinyl-installation-guide.
- "Tips for a Successful Vinyl Wrap Installation." Available at https://www.example.com/tips-for-a-successful-vinyl-wrap-installation.